The Advanced Search Widget gives you more control and flexibility by allowing users to search using multiple filters. Instead of just typing a keyword, visitors can sort and refine results based on categories, tags, post types, or additional fields you enable.
How to Use Advanced Search Widget of Easy Elements Pro
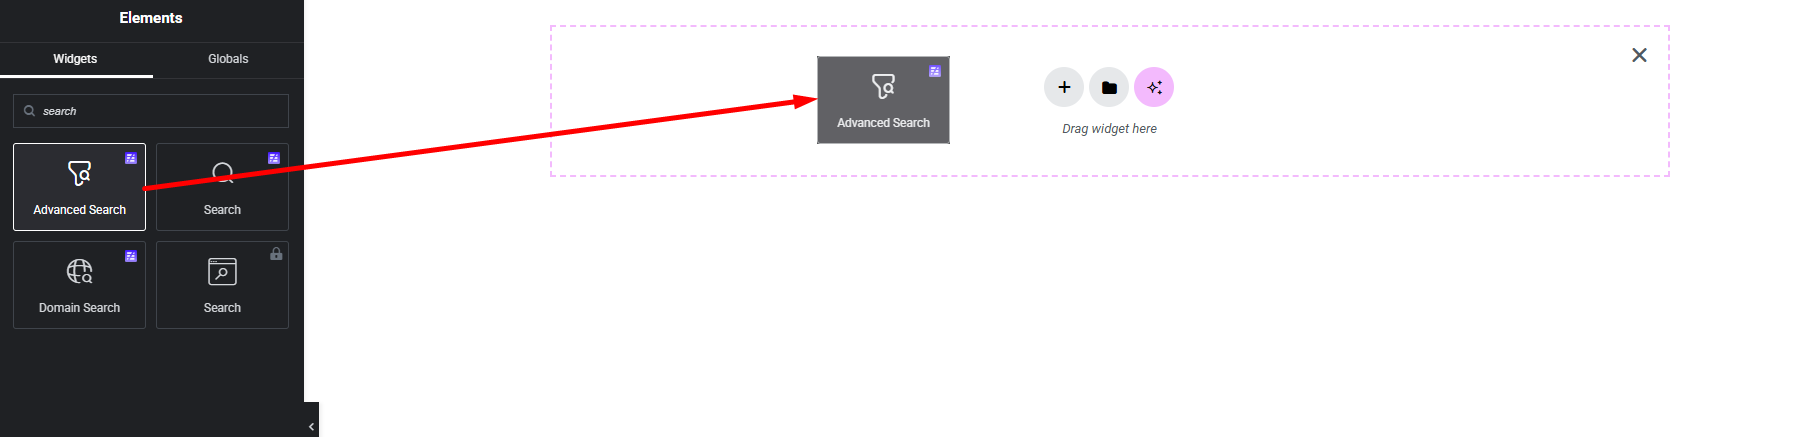
Step 1:
Add Advanced Search Widget:
Select the Advanced Search widget from the left panel, then drag and drop it into your desired area on the canvas.
Step 2:
Advance Search Settings:
- Query Control
- Results Area
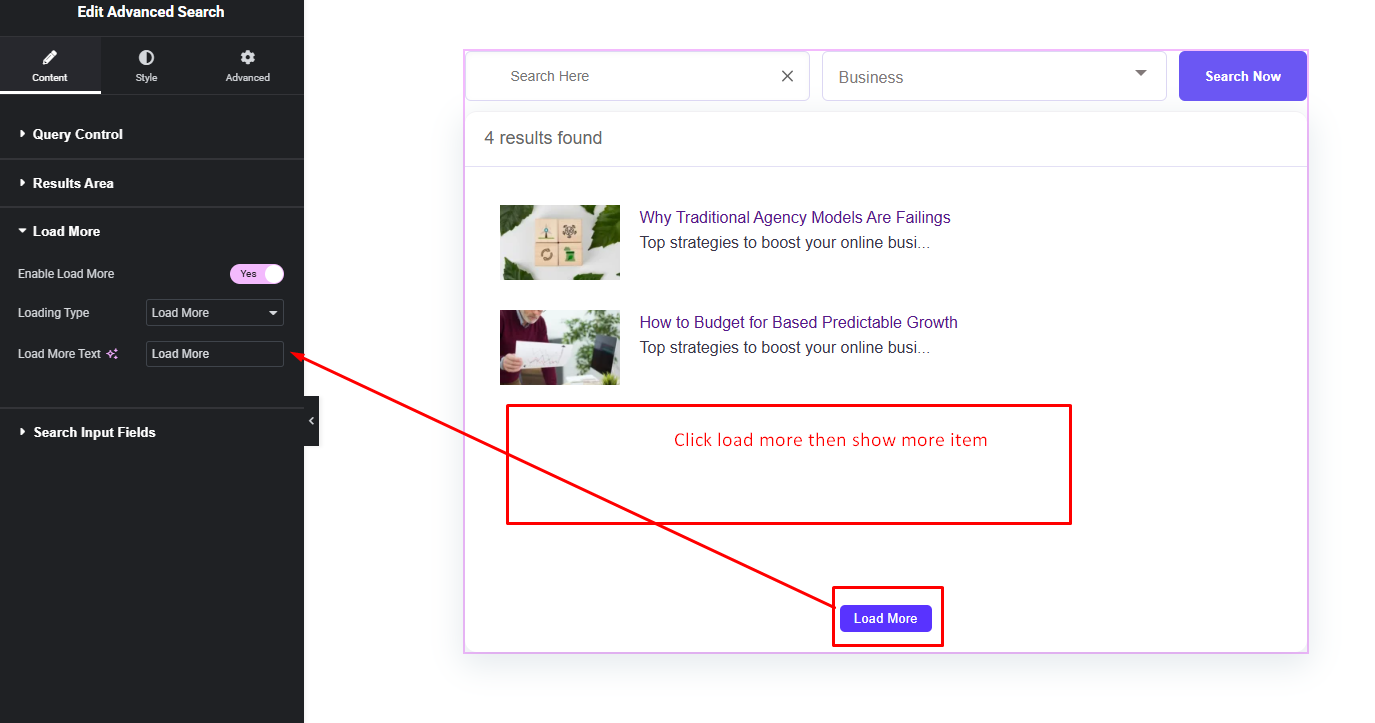
- Load More
- Search Input Fields
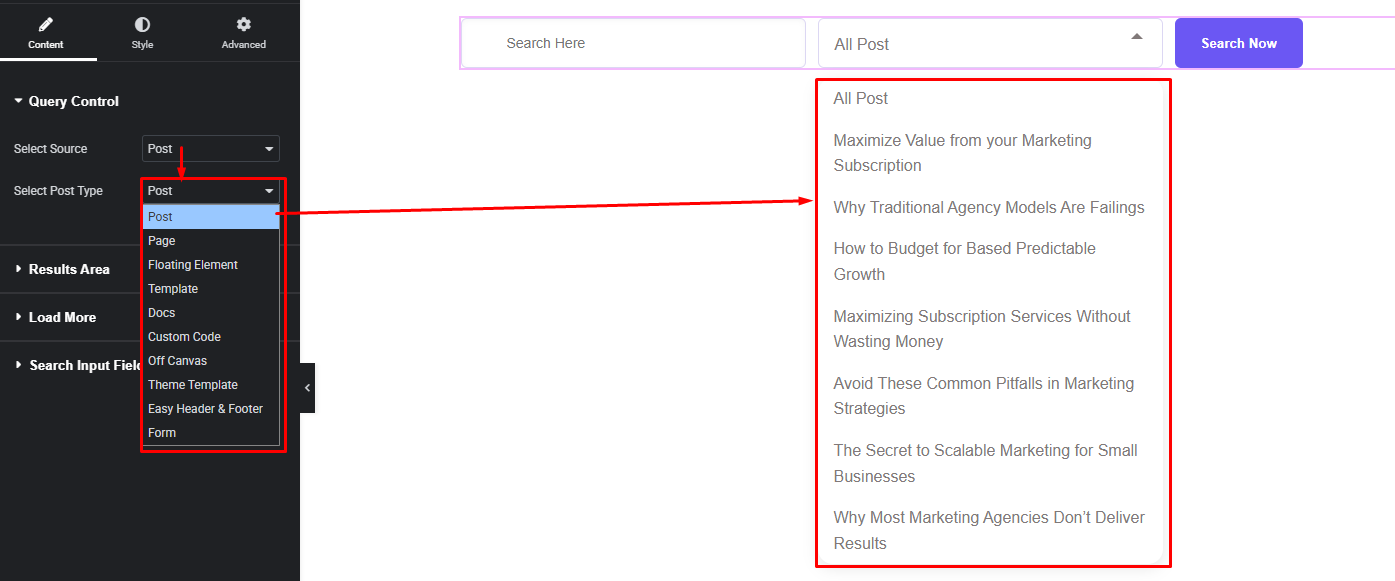
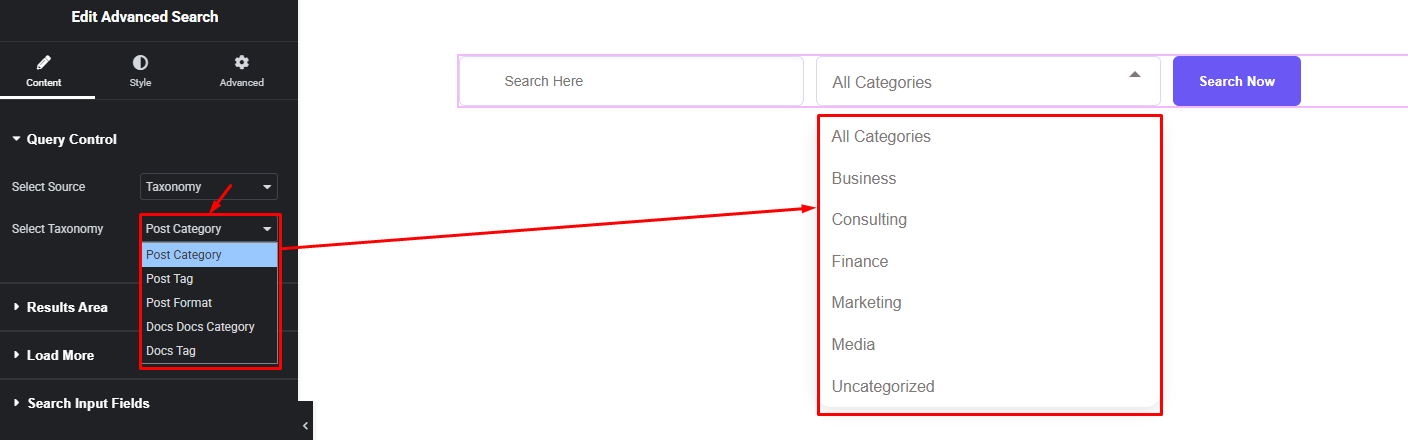
Query Control:
- Select Source: Choose where the search will pull data from (Posts or Taxonomy).
- Select Post Type or Taxonomy: Select the specific post, pages or taxonomy that users can search (e.g., blog posts, portfolio items, products or post category, post tag etc.).
Select Post Type:
This option lets you choose the main source of the search results. You can decide whether the search will look through posts, pages, or custom post types. It helps you define exactly what type of content users should be able to search on your website.
Select Taxonomy:
After selecting the source, choose the specific post taxonomy you want to include in the search. For example, you can allow searching posts only by blog category or tag. This gives you full control over the search area.
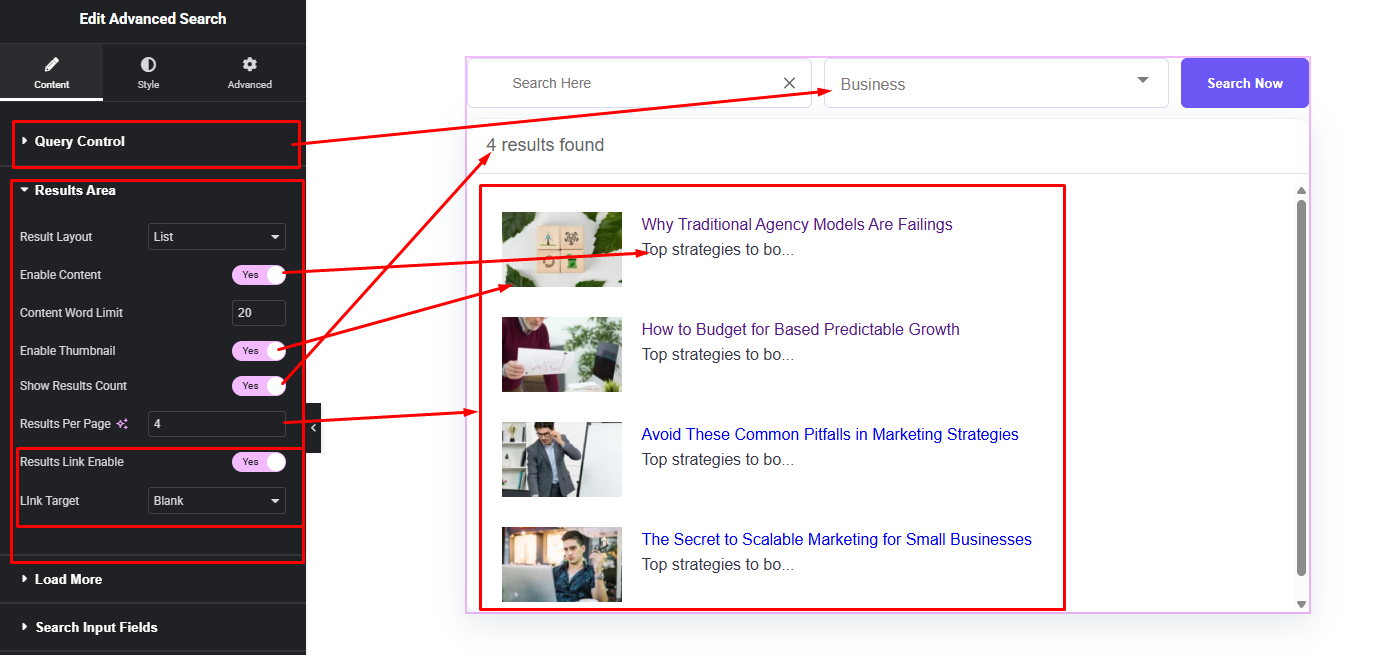
Results Area:
- Result Layout Style
- Search Item Content Show/Hide
- Item Content word limit
- Item Thumbnail Show/Hide
- Total Result Count Show/Hide
- Results Per Page
- Item link options
load More Button:
Set how many results will appear at first, item number add to (Result Area -> Results Per Page). If more items are available beyond this limit, a ‘Load More’ button will automatically appear so users can view additional results without reloading the page.
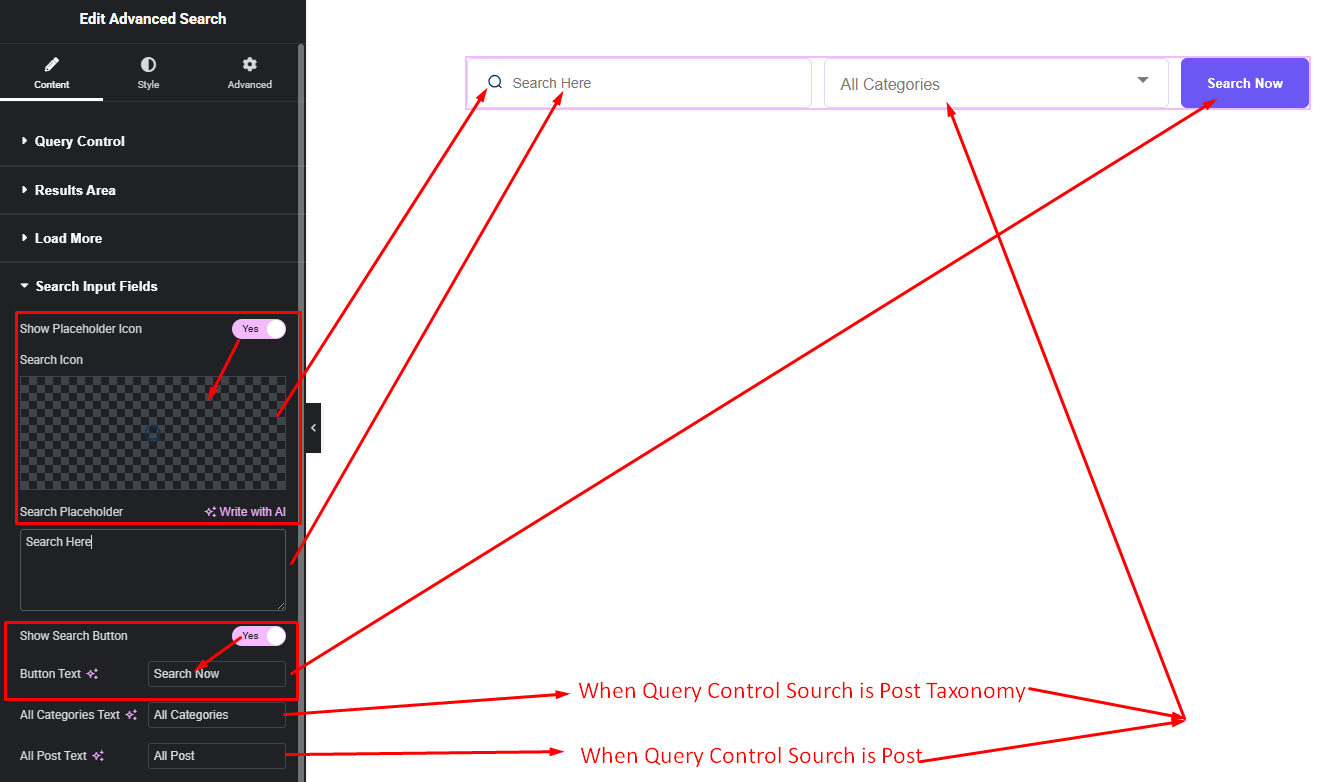
Search Input Fields:
Step 3:
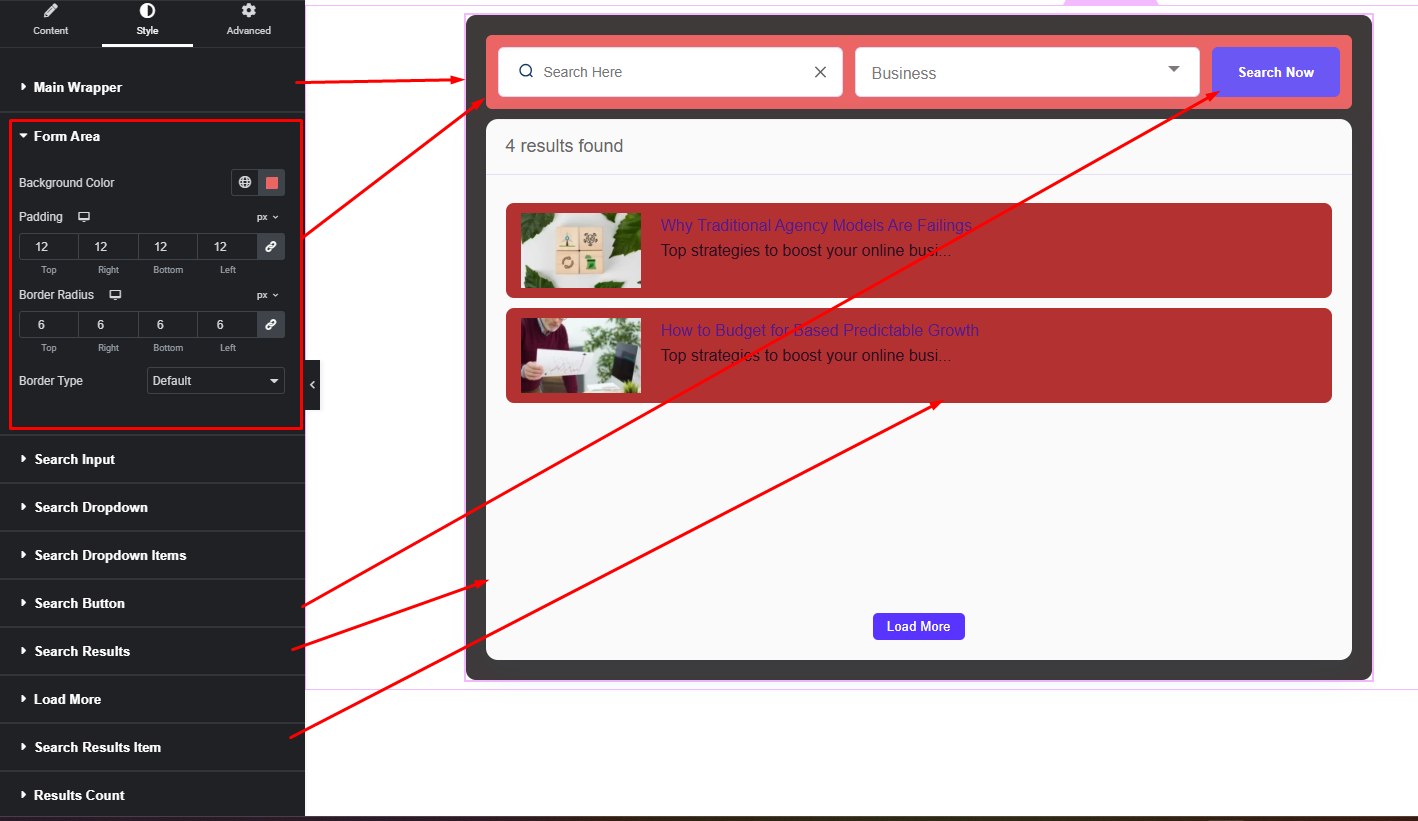
Customize Advance Search Style:
Easily customize your widgets appearance including Advance Search wrapper Style, form area style, search input & dropdown style, search result area and item style and more —all from the Style panel.
Watch this video with all settings changes and previews.
Video Coming Soon


