The Protected Content widget allows you to hide specific sections of your page and make them accessible only to selected users. You can restrict content by password, user role, or login status, ensuring only the right audience can view your protected information.
How to Use Protected Content Widget of Easy Elements Pro
Step 1:
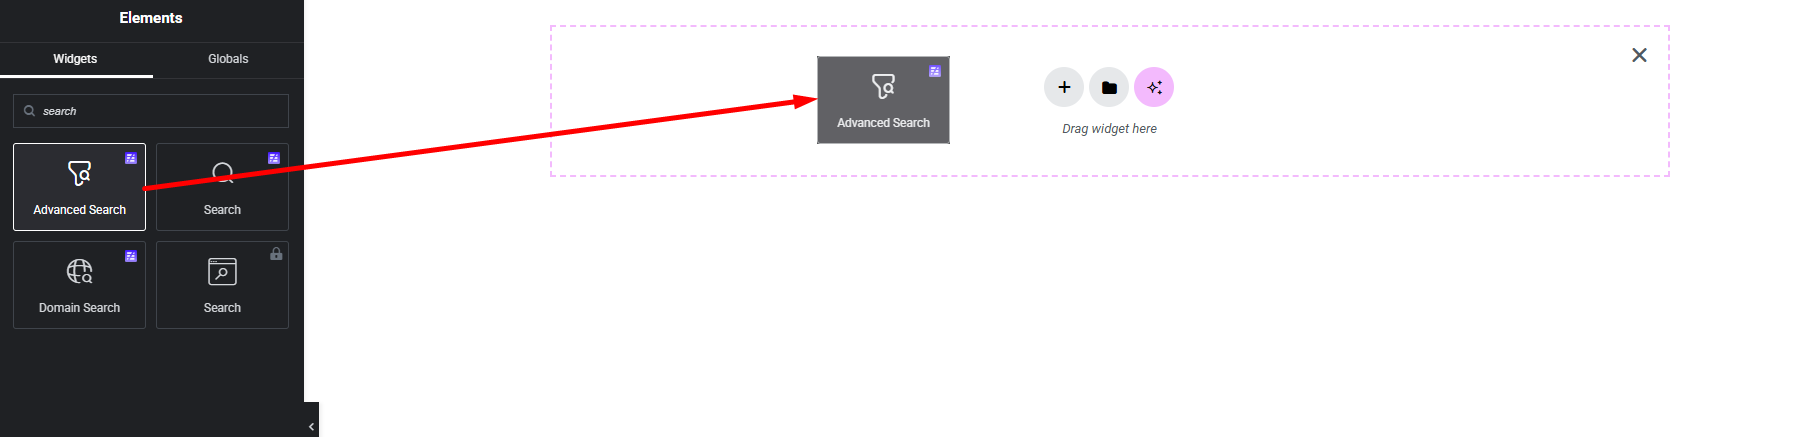
Add Protected Content Widget:
Select the Protected Content widget from the left panel, then drag and drop it into your desired area on the canvas.
Step 2:
Protected Content Settings:
- Content Type
- Protection Type
- Warning Message
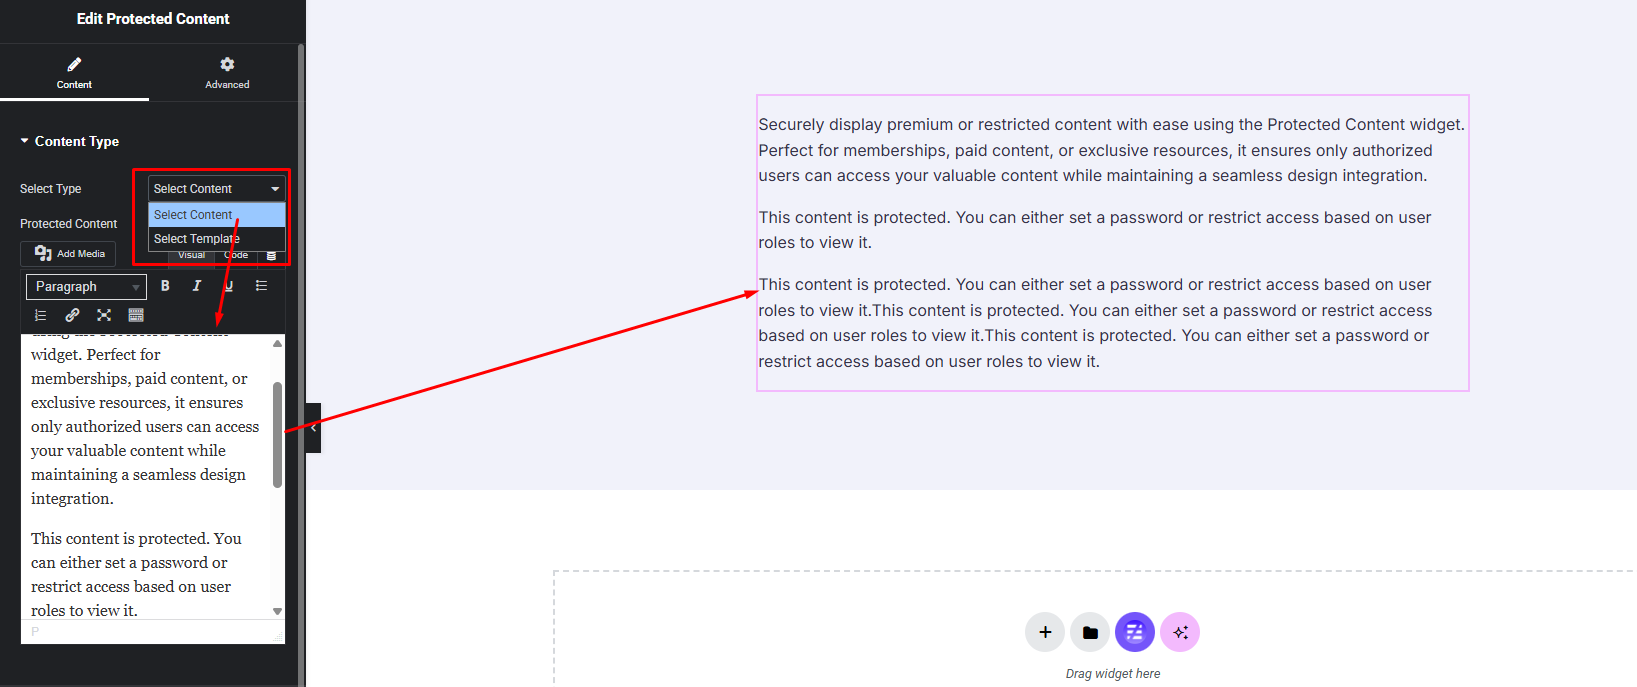
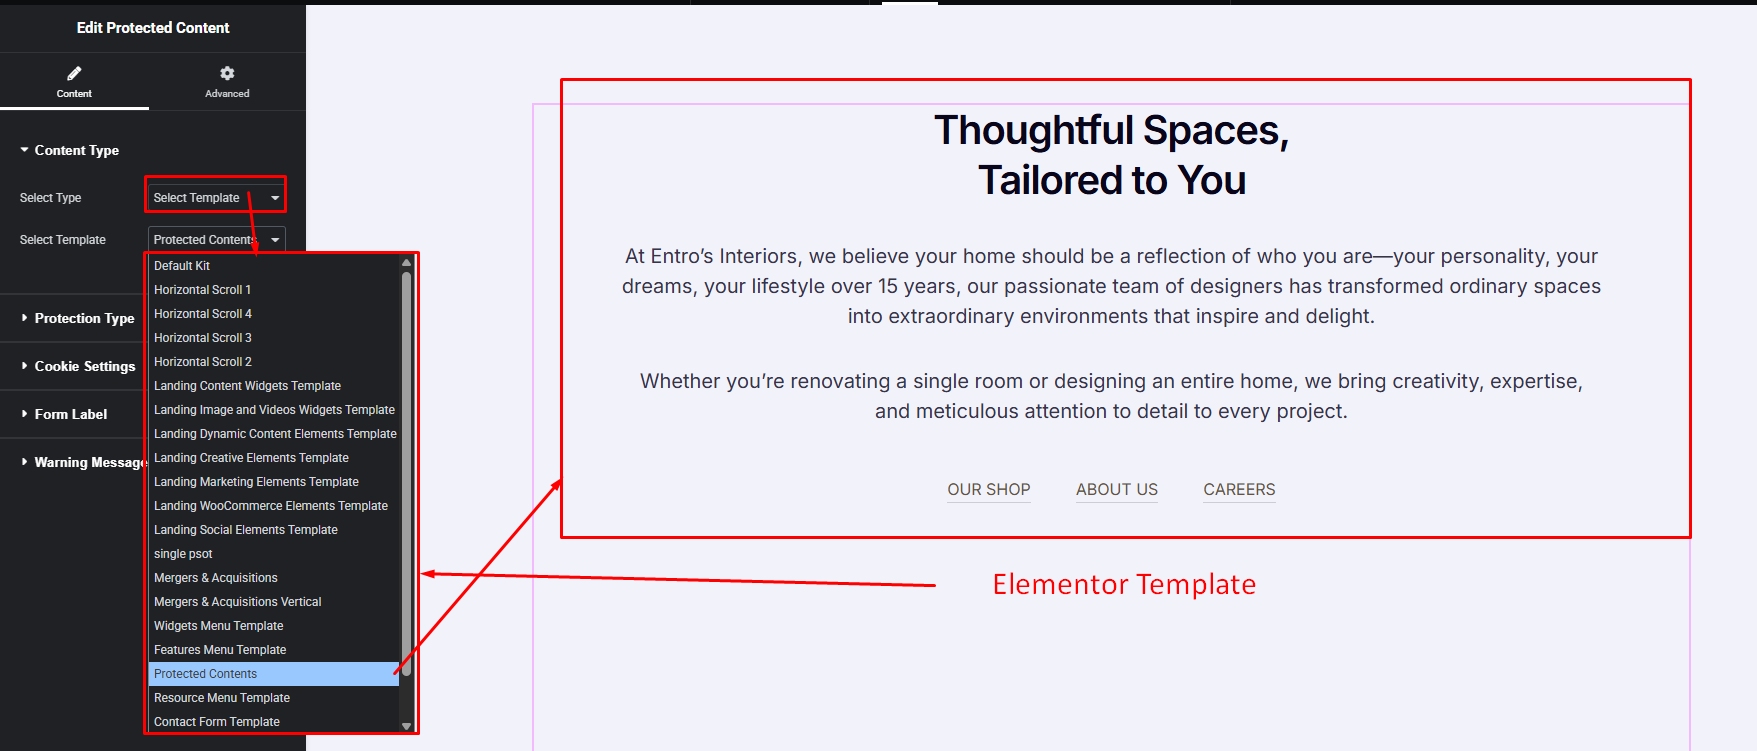
Content Type:
- Normal Content
- Template Content
Normal Content:
Display simple protected content using the Text Editor. Perfect when you want to show basic text without using templates.
Template Content:
Select an Elementor template to show as your protected content. This allows you to design the restricted section separately and reuse it anywhere
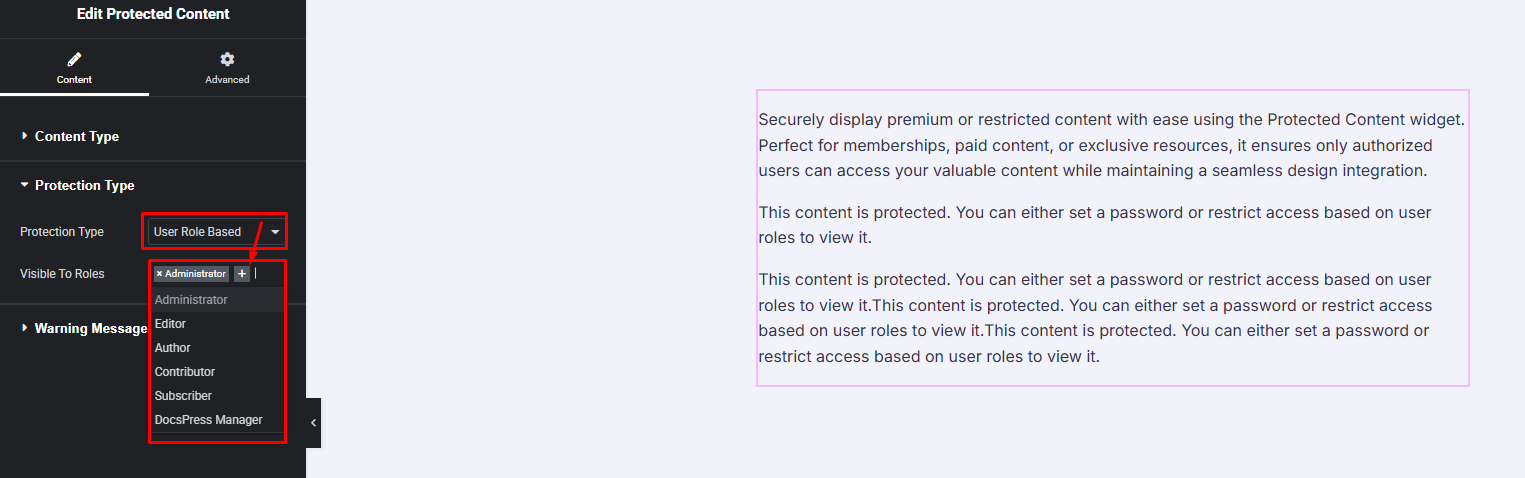
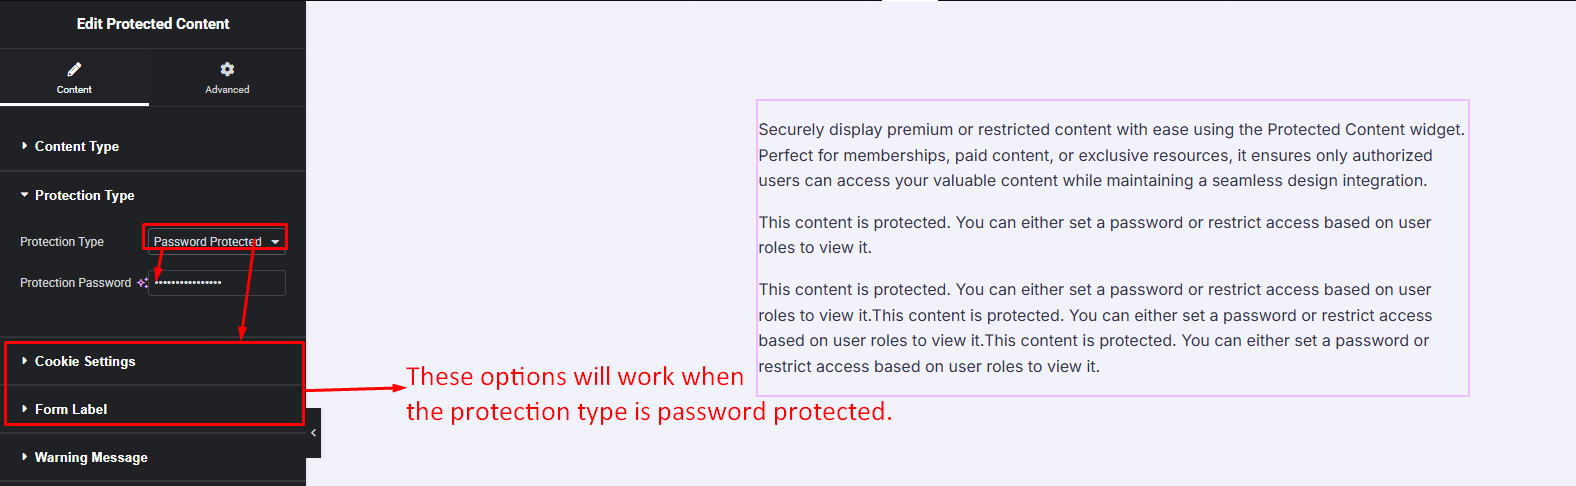
Protection Type:
- User Role Based
- Password Protected
User Role Based:
Restrict content visibility based on specific user roles. Only users with the selected roles will be able to access the protected content. (ex role: Administrator, Author, Editor etc.)
Password Protected:
Protect your content with a password. Only users who enter the correct password can view the restricted content.
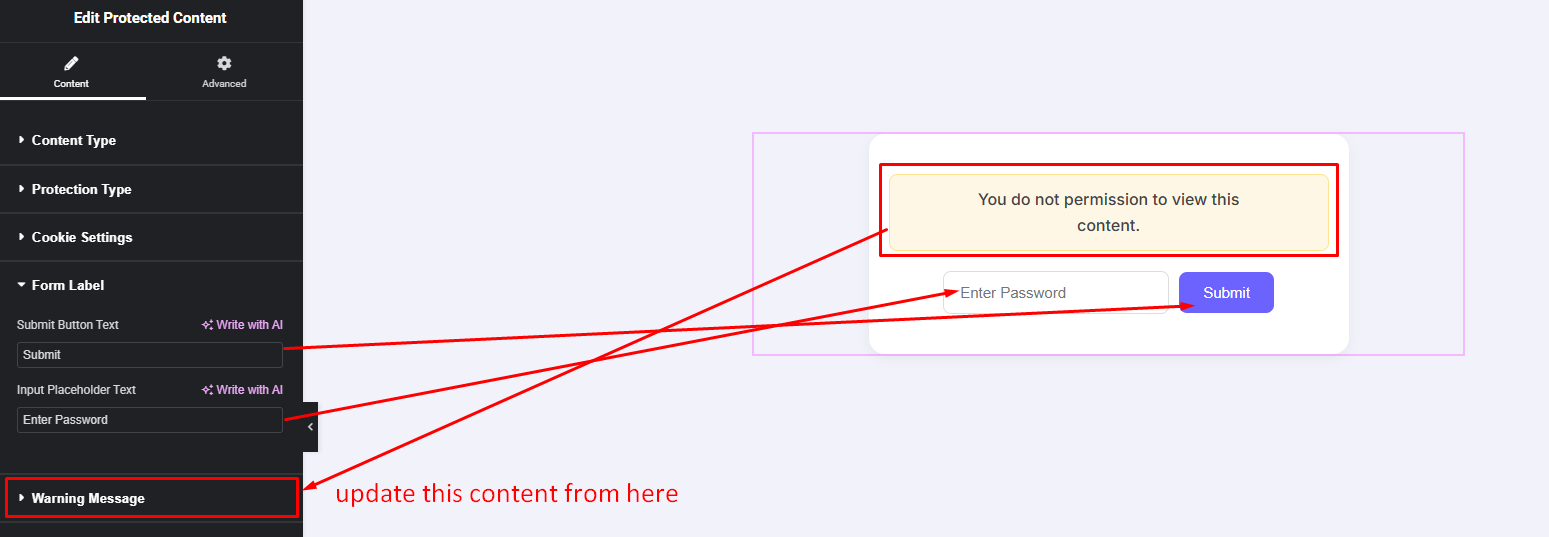
Warning Message:
- Unauthorized Message
- Wrong Password Message
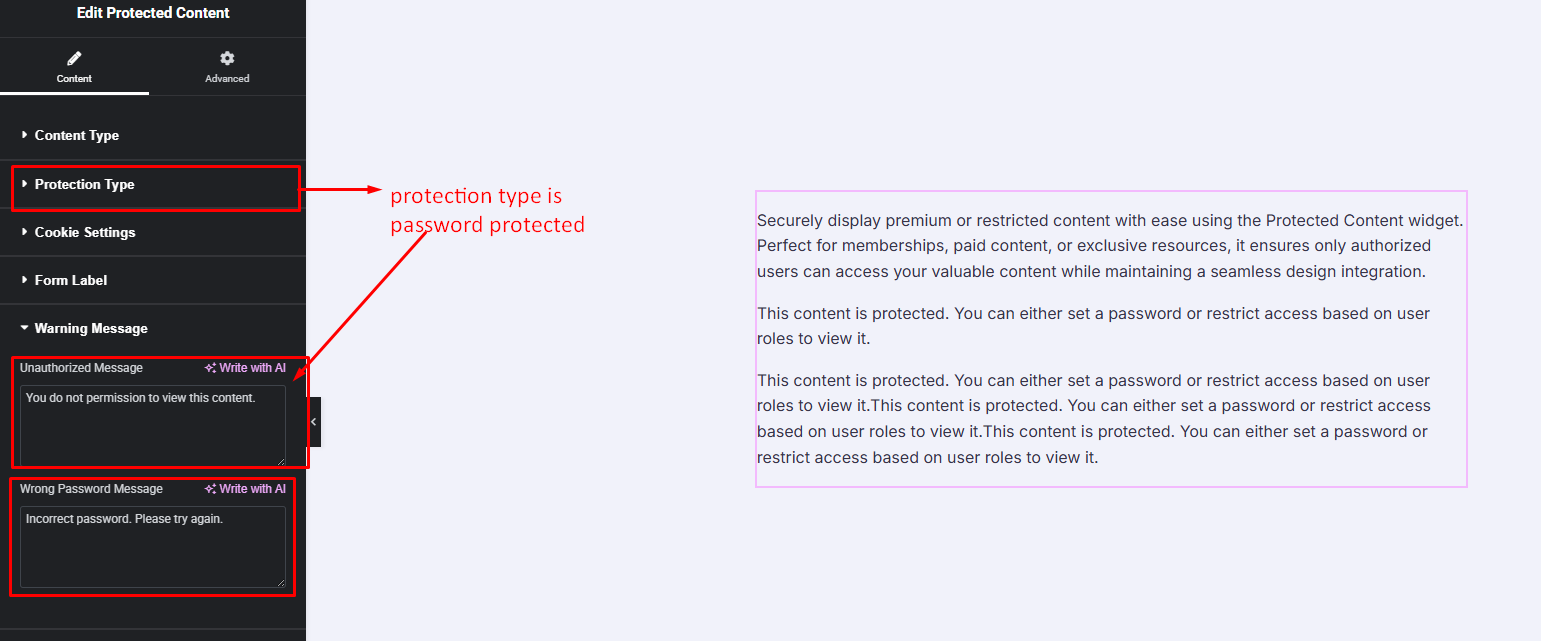
Protection Type: Password Protected
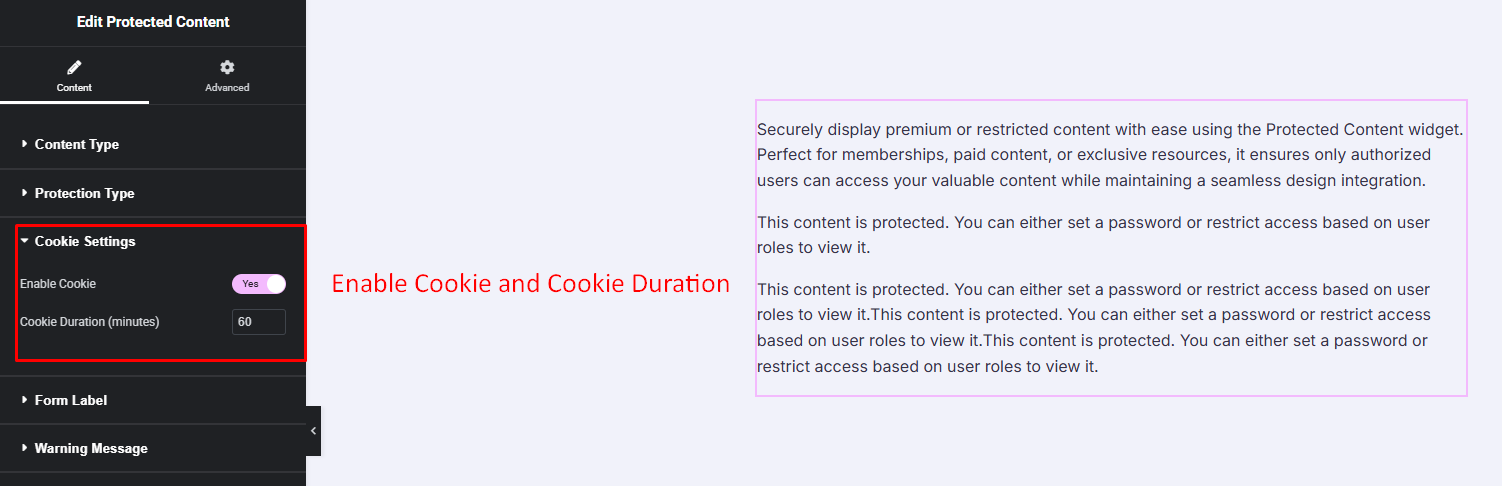
- Cookie Settings
- Form Label
Cookie Settings:
Form Label: