


Displaying data in a clean table format is important when you want to show pricing plans, product comparisons, schedules, statistics, reports, feature lists, or service packages.
The good news is, you do not need custom HTML or coding to create a professional data table in WordPress. With Easy Elements for Elementor, you can build and customize advanced data tables visually inside the Elementor editor.
In this tutorial, we will show you how to create a data table in WordPress using Elementor + Easy Elements Free & Pro.
Quick Overview
To create a data table in WordPress, you need:
- Elementor Free
- Easy Elements Free
- Easy Elements Pro for advanced table options
After installing the plugins, you can:
- Enable the Advanced Data Table widget
- Drag and drop the widget in Elementor
- Add table headers and body content
- Customize table style
- Enable responsive options
- Add search, pagination, and other advanced controls if available in Pro
Why Use a Data Table in WordPress?
A data table helps visitors understand information faster. Instead of writing long paragraphs, you can organize data into rows and columns.
You can use data tables for:
- Pricing comparison
- Product feature comparison
- Hotel room facilities
- Service packages
- Course schedules
- Event lists
- Restaurant menus
- Business reports
- Plugin free vs pro comparison
- WooCommerce product details
Prerequisites Before Creating a Data Table
Before starting, make sure you have installed:
- Elementor
- Easy Elements Free
- Easy Elements Pro, if you want advanced styling and premium options
Go to your WordPress dashboard and install the required plugins.
How to Create a Data Table in WordPress with Easy Elements
Step 1: Enable the Advanced Data Table Widget
First, go to your WordPress dashboard. Navigate to:
Easy Elements > Widgets. Find the Advanced Data Table widget and enable it.
After enable it setting will auto Save.
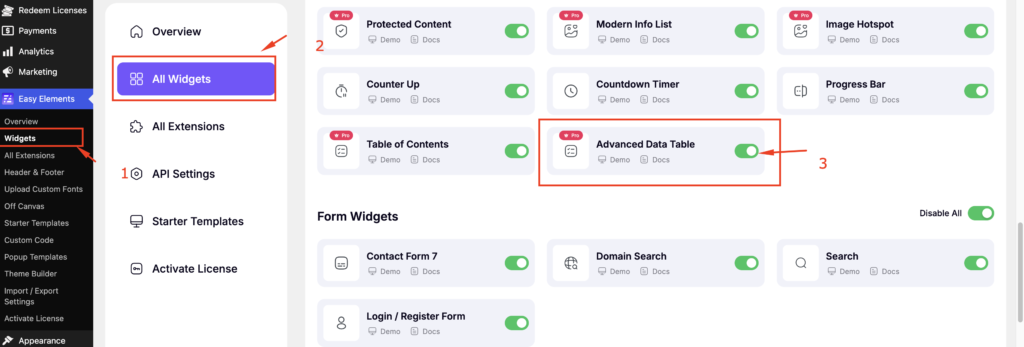
This makes the widget available inside the Elementor editor.
Step 2: Edit a Page with Elementor
Now go to:
Pages > Add Page
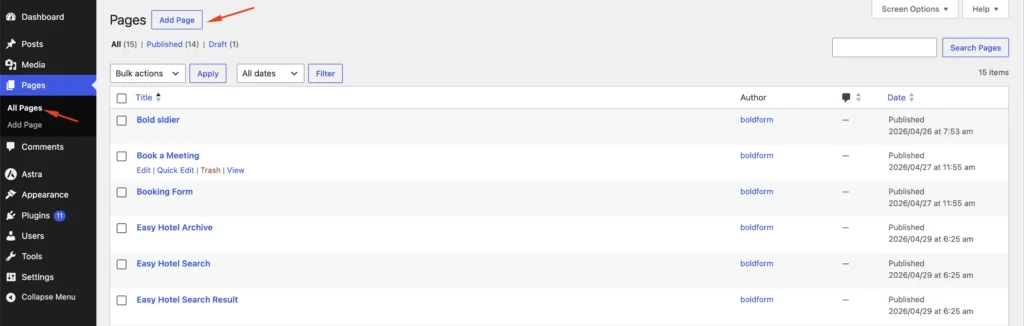
Give your page a title, then click Edit with Elementor.
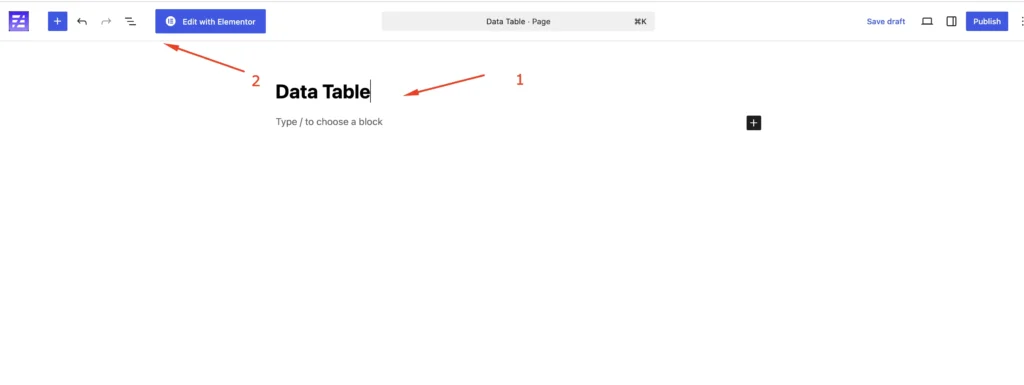
You can also open an existing page and edit it with Elementor.
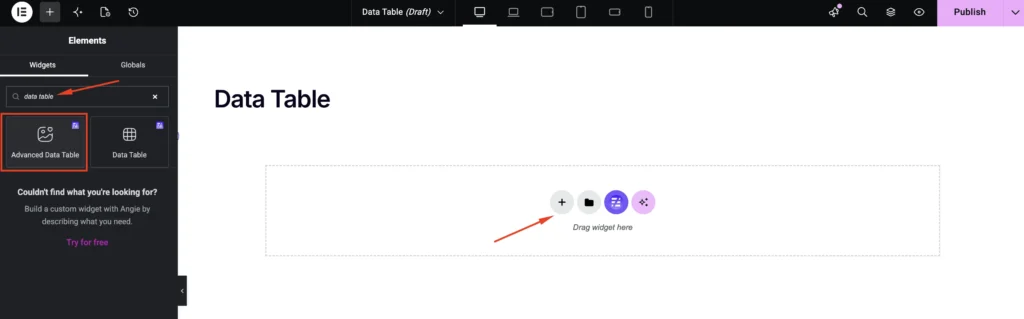
Step 3: Drag and Drop the Advanced Data Table Widget
Inside Elementor, search for: Advanced Data Table
Drag the widget into your page section. Now you can start adding your table content.
Step 4: Add Table Header Content
In the widget content settings, add your table headers.
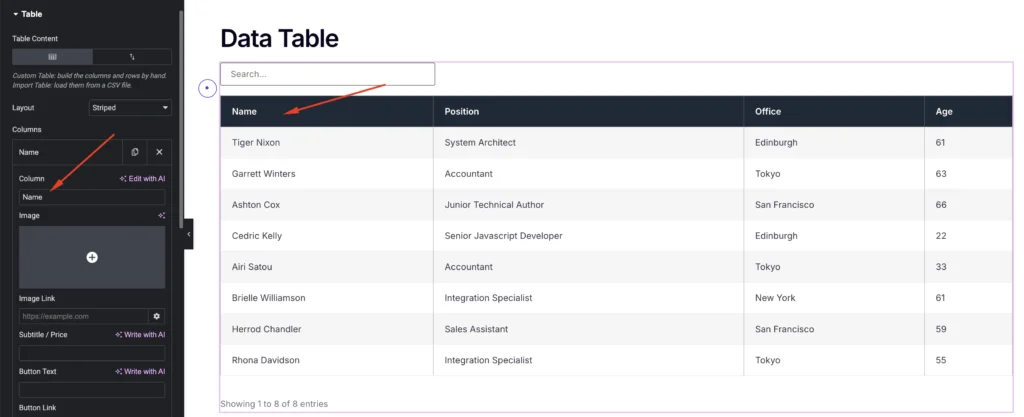
Step 5: Add Table Body Rows
After adding headers, add your table body content.
You can create multiple rows and columns based on your needs.
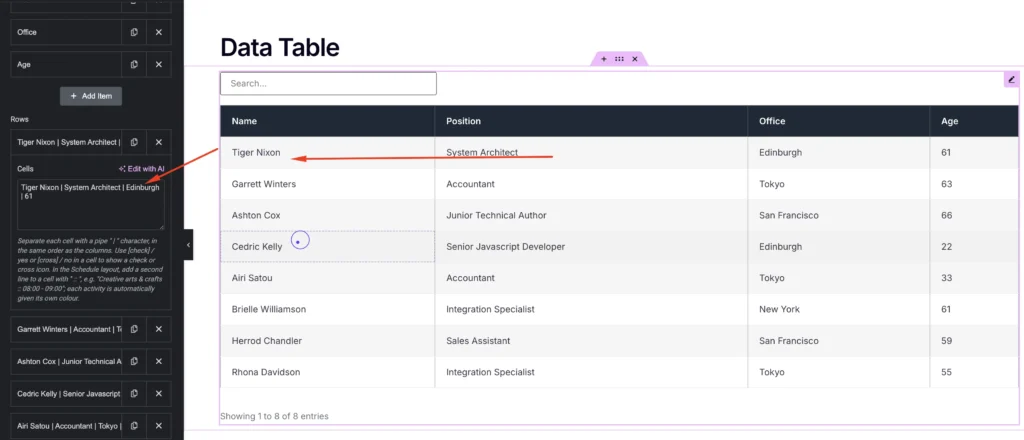
Use short and clear text so visitors can scan the table easily.
Step 6: Customize Table Settings
Depending on your Easy Elements Free or Pro options, you can customize:
- Table header
- Table body
- Row spacing
- Column width
- Text alignment
- Border style
- Background color
- Hover effect
- Search option
- Pagination
- Responsive behavior
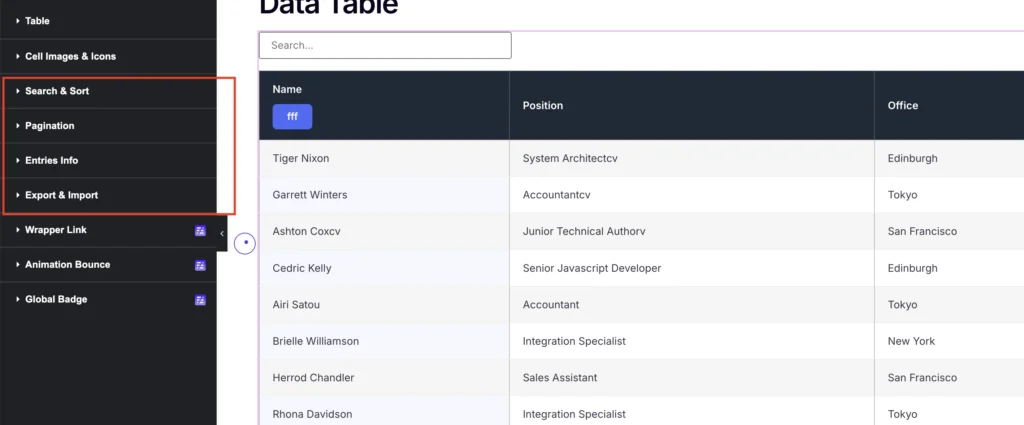
For better user experience, enable responsive table settings so the table looks good on mobile devices.
Step 7: Style the Data Table
Go to the Style tab in Elementor.
Customize:
- Header background color
- Header text color
- Body text color
- Row background
- Border color
- Padding
- Typography
- Box shadow
- Cell spacing
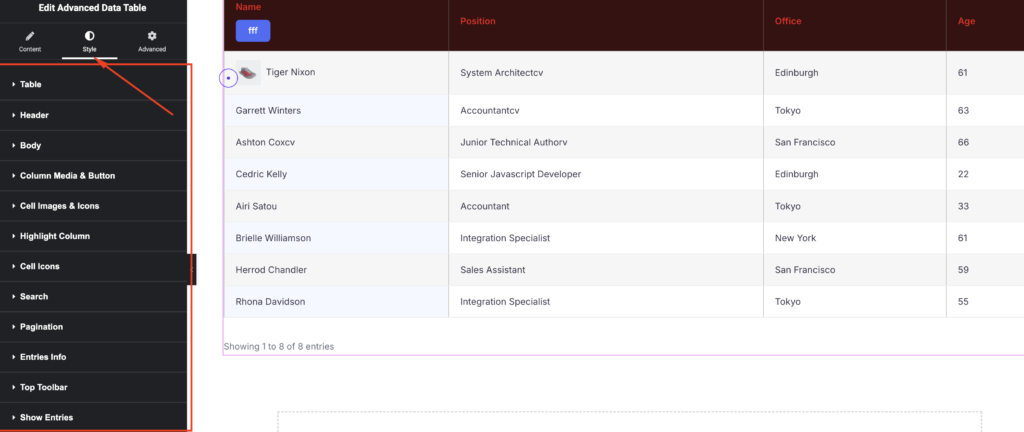
Try to keep the design clean. A table should be easy to read, not over-designed.
Image suggestion: Add screenshot of table style settings.
Step 8: Check Mobile Responsiveness
Before publishing, switch to Elementor responsive mode.
Check:
- Desktop view
- Tablet view
- Mobile view
If the table has many columns, make sure it does not break on mobile.
Step 9: Publish the Page
Once everything looks good, click Update or Publish.
Your WordPress data table is now live.
Best Practices for Creating Better Data Tables
- Keep column names short
- Avoid too many columns on mobile
- Use bold text for important values
- Use different background color for table header
- Keep enough spacing between rows
- Add CTA buttons for pricing or comparison tables
- Use responsive preview before publishing
- Keep data updated regularly
Where Can You Use Advanced Data Table?
You can use the Easy Elements Advanced Data Table widget for:
- SaaS pricing pages
- Elementor product comparison
- WordPress plugin feature table
- Hotel booking room facilities
- Agency service packages
- Restaurant menu lists
- Course module tables
- Event schedules
- Product specification tables
Final Thoughts
Creating a data table in WordPress becomes much easier when you use Elementor and Easy Elements. You can build tables visually, customize the design, and make your data easier for visitors to understand.
If you want a simple table, Easy Elements Free can help you get started. If you need more styling control and advanced table options, Easy Elements Pro is the better choice.